Note: Installation instructions for a specific operation system are boxed
and preceded by the following icons:
CP104 uses the Eclipse IDE (Integrated Development Environment) to create programs in Python. Eclipse is not dedicated to one language but supports plug-ins that allow projects in a wide range of languages to be developed. The plug-ins for Eclipse include: Python, Java, C, C++, PHP, SQL, and COBOL. Eclipse is written in Java, so it works across multiple platforms. You can even modify existing plug-ins or write your own. Best of all, it's free! The current version of Eclipse as of this writing is 2021-06. The Department of Physics & Computer Science uses Eclipse in its labs for developing Python, Java, and C language projects. Should you wish to use Eclipse on your own computer, this document is a guide to installing Eclipse at home.
The Eclipse Foundation provides our global community of
individuals and organizations with a mature, scalable, and
business-friendly environment for open source software collaboration
and innovation.
(http://www.eclipse.org/)
Note:
These documents refer to the most current versions of Java, Python, and Eclipse as of this writing. Note that different computer set ups and themes means that the appearance of the screen shots in these documents may not match exactly your computer system.
Follow these steps to install Eclipse on your own computer. If you already have Eclipse installed, but just wish to use it for a course other than CP104, simple create a new workspace by following the instructions in the Using Eclipse with PyDev tutorial.
- Install Java
- Install Python
- Install Eclipse
- Install PyDev
- Configure PyDev
- Configure Eclipse
This is a detailed process, so follow the instructions carefully. You should only have to do this once.
If you have difficulties with the install process, contact a Lab Instructor or an IA during a lab or during a Help Session.
Step 1: Install Java
Eclipse is a Java program and therefore requires Java to run. Your operating system must have a copy of the Java SE JDK (Java Development Kit) on your system in order to run Eclipse. Eclipse 2022-06 (the latest version as of this writing) requires a Java JDK of version 11 or later.
Download the Java SE JDK that is appropriate to your computer's operating system from the Java Downloads page.
Download and install the Windows x64 product.
The Mac OS ships with Java 1.6. This older version must be removed from your computer before the newer version is installed. Depending on the version of your operating system, navigate to one of the following two folders:
Macintosh HD/Library/Java/JavaVirtualMachines/

Macintosh HD/System/Library/Java/JavaVirtualMachines/
and remove the folder named 1.6.0.jdk (or a similar
name). Removing this folder requires administrator privileges, so be
prepared to enter the appropriate password when asked.
Download and install the Mac OS X x64 product.
Download and install the Linux x64 .rpm or .gz
file as you prefer.
Execute the files that you have downloaded. These programs must be run with your computer's administrator privileges, so be prepared to enter your appropriate password when asked. Use the installer's default settings.
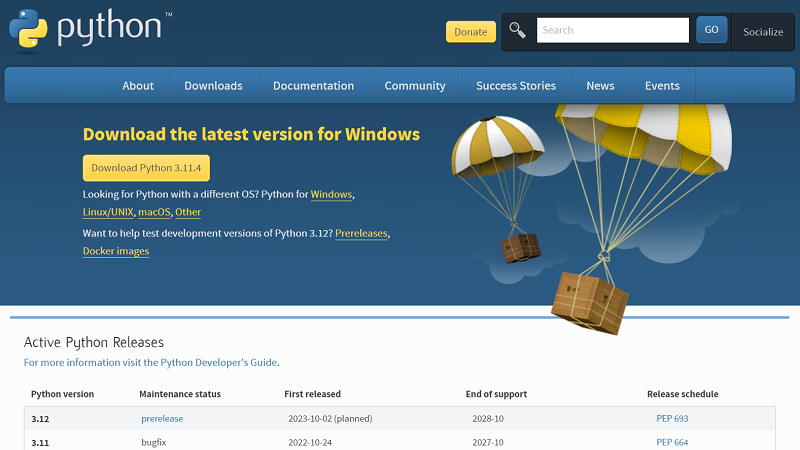
Step 2: Install Python
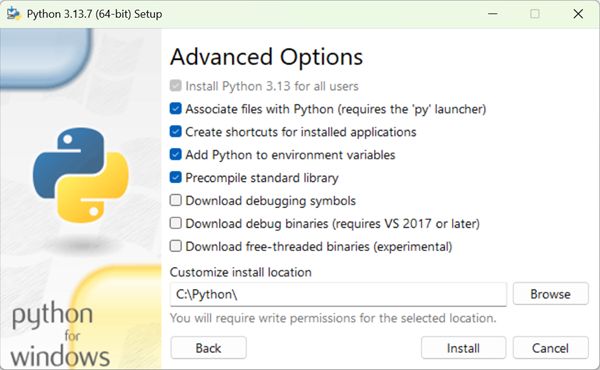
Download the latest version of Python from Python Downloads. (At the time of this writing the latest version of Python is 3.13.7.) The web page offers you the version of Python appropriate to your operating system. Execute the file that you have downloaded. This program must be run with your computer's administrator privileges, so be prepared to enter your appropriate password if asked.
Note:
Pay close attention to where on your computer Python is installed and write it down. (The section outlined in red above notes where Python is being installed. You may choose a different installation path by using the Customize installation option if you like.) You may need this location when you Configure PyDev later on in this process. We suggest C:\Python for Windows for a simple, easy to find path.
Click on the option
Add Python to environment variable
(or
its Mac/Linux equivalent) as noted below.
Step 3: Install Eclipse
Download the latest version of Eclipse from Eclipse Downloads. (At the time of this writing the latest version of Eclipse is 2021-06.) The web page offers you the version of Eclipse appropriate to your operating system. Execute the file that you have downloaded. This program must be run with your computer's administrator privileges, so be prepared to enter your appropriate password if asked.
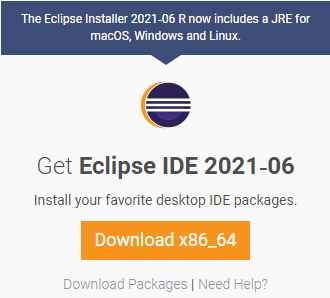
Executing the Installer brings up the Eclipse Installer splash page followed by an initial list of install options.

This install includes a recent copy of Java, so you don't have to download and install Java separately.
Press the menu button ![]() and select ADVANCED
MODE...:
and select ADVANCED
MODE...:
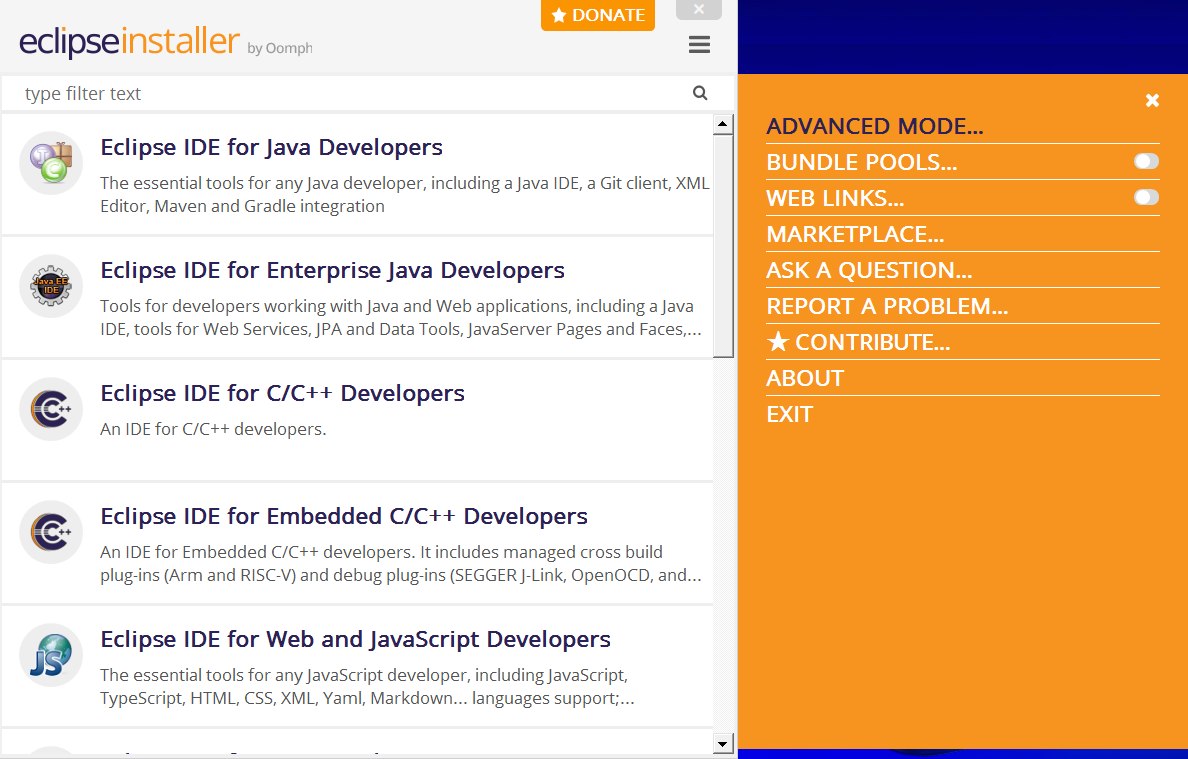
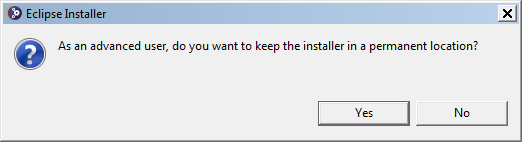
When asked if you wish to keep the installer in a permanent
location
, press :
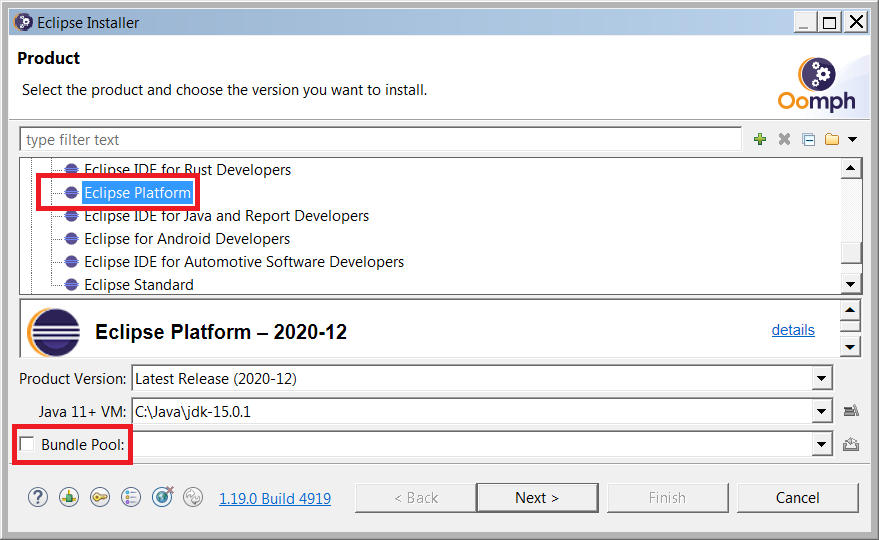
From the Product dialog box, choose the product version Eclipse Platform and turn off the Bundle Pool option (both outlined in red):
If the Java 11+ VM: or JRE 11 Location: is blank, you
can find your own copy of Java by going to a Windows command prompt and
typing the command where java:
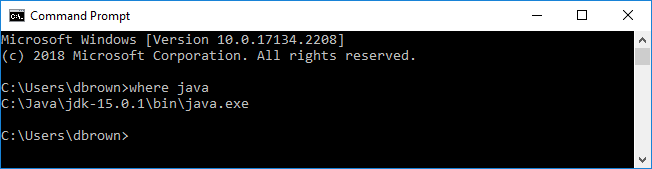
This example tells us that Java is at C:\Java\jdk-15.0.1\bin\java.exe,
and you can enter this in the location box.
Finding Java seems to be less of a problem on Macs - so long as you have installed a newer version of Java - but let us know if it is an issue for you.
Press .
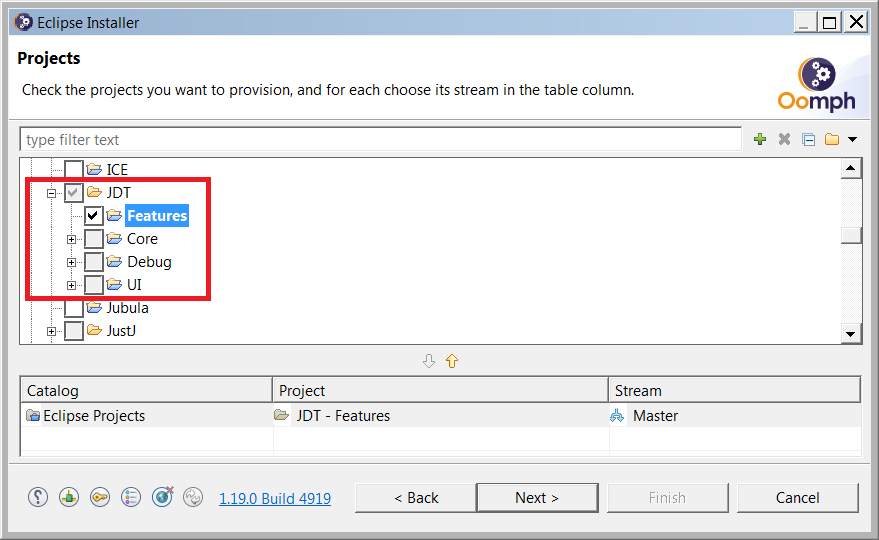
Choose JDT Project Features from the Projects list (outlined in red):
Press .
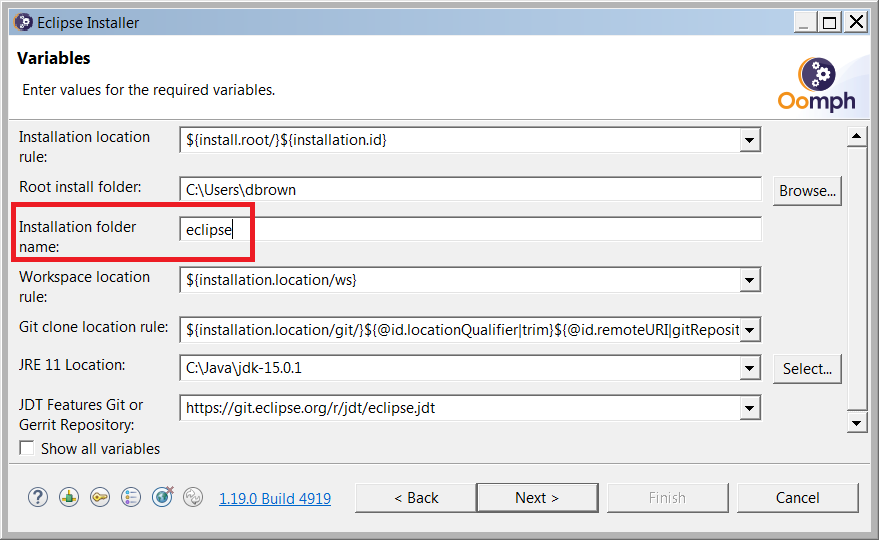
Change the Installation folder name to eclipse:
Press .
Confirm the installation settings:
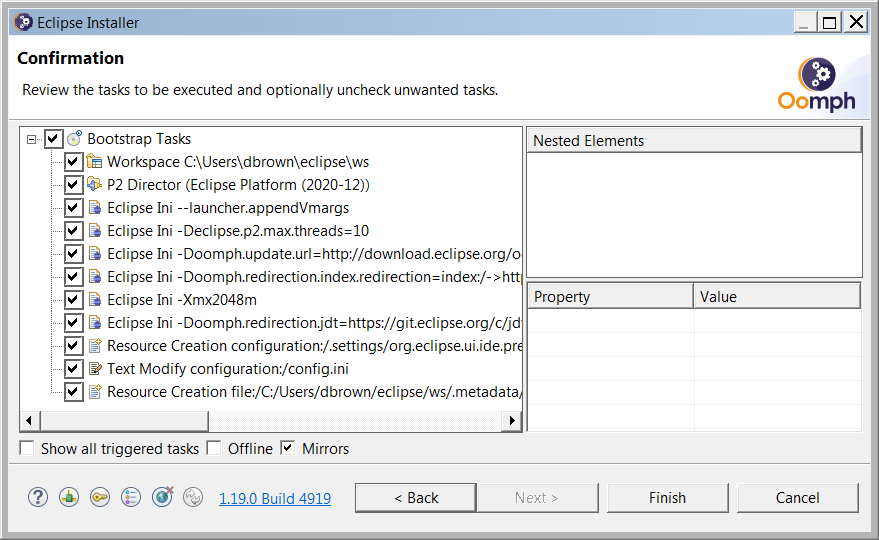
Press .
Eclipse is now being installed, and takes a few minutes to download and install its files:
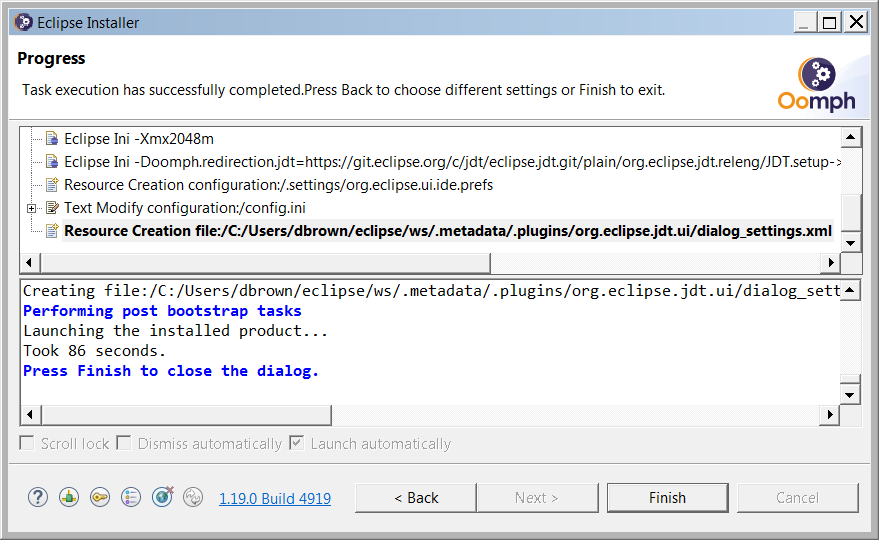
Press .
During the install process, Eclipse itself starts:
Eclipse may attempt to update at this time. This is not necessary, and if any errors occur you may cancel the update without problem.
Eclipse may ask for a workspace. The default workspace is inside the Eclipse installation folder in your home directory:
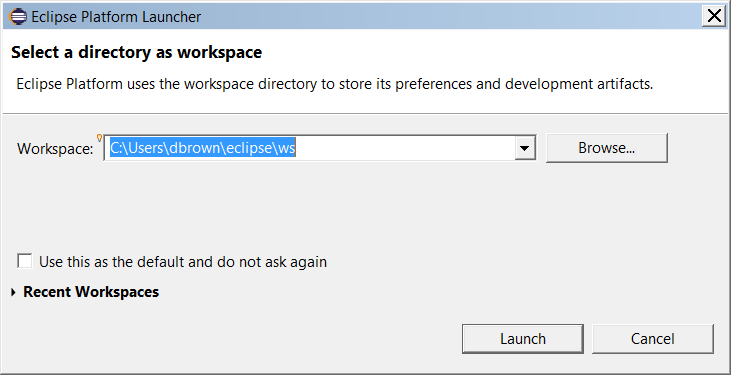
If necessary, press .
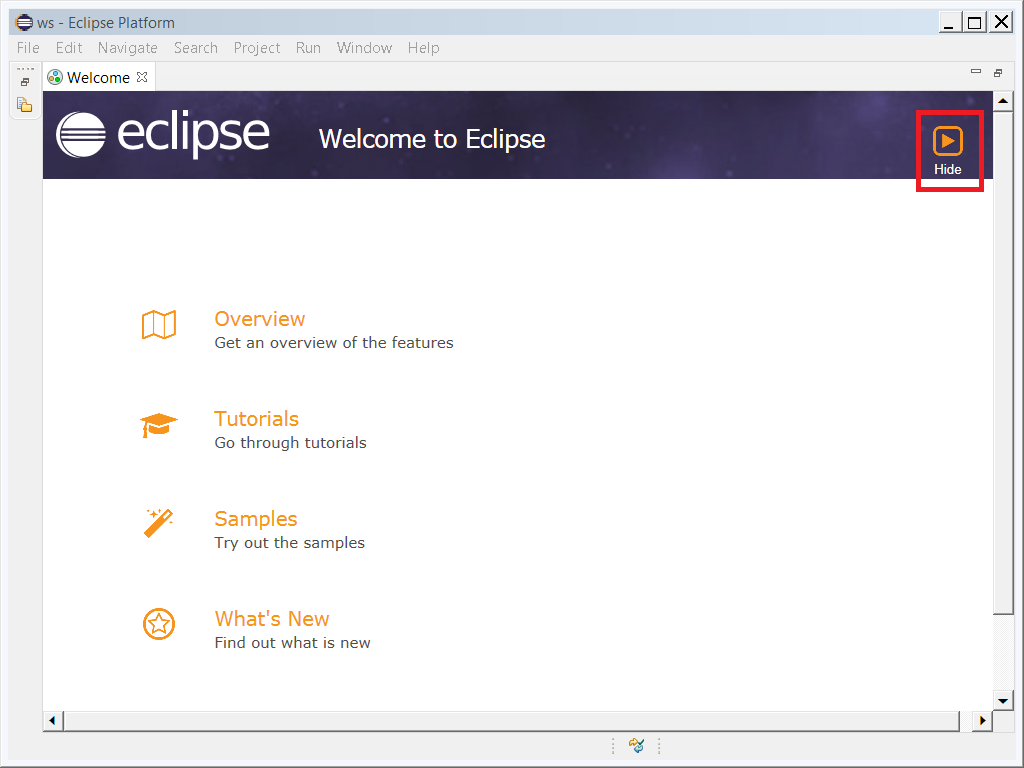
Eclipse now shows its Welcome screen. Close this screen by clicking on the Hide icon (outlined in red):
Eclipse is now installed in your home user folder: home folder/eclipse/eclipse,
with the default workspace home folder/eclipse/ws.
Verify that Eclipse is correctly installed by exiting Eclipse (from the main menu choose File/Exit), and go the installation folder and run the Eclipse executable file there.
You may copy a short-cut for the executable to your desktop or task bar if you like, but make sure to not copy or move the executable itself - use only short-cuts.
Step 4: Install PyDev
PyDev (Python Development Environment) is an Eclipse plugin for Python development, available from http://pydev.org/.
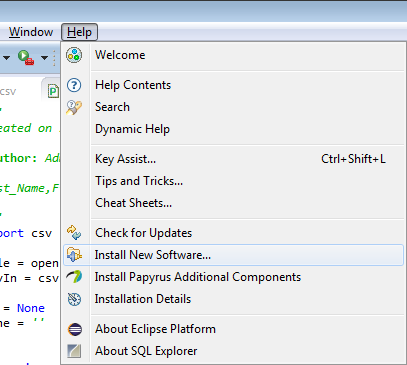
Plug-ins are installed through Eclipse's software installation mechanism. From the Help menu choose Install New Software.
This displays the Install dialog box.
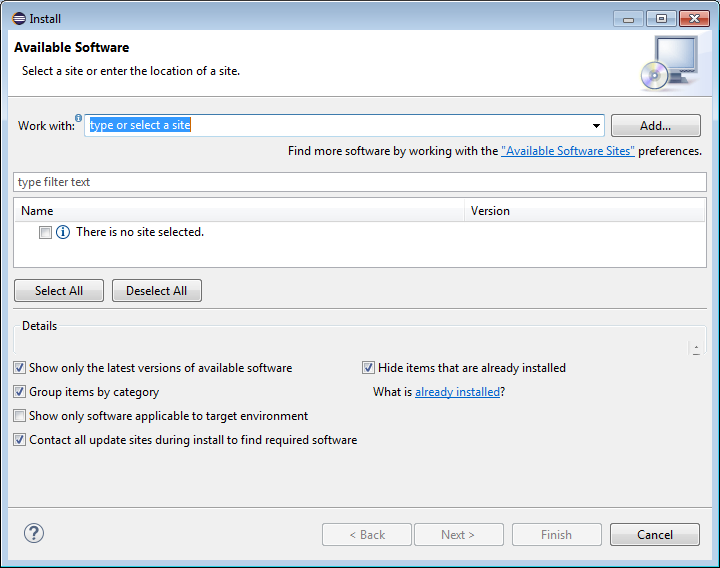
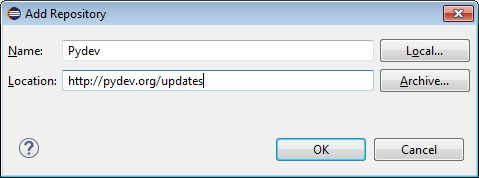
Pressing the Add button displays the Add Repository dialog box that allows you to enter the name and URL of the plug-in you wish to install. The installation URL to enter into Eclipse's Add Repository dialog box Location is:
http://pydev.org/updates
Name this location PyDev:
Press .
If Eclipse is able to connect to the plug-in URL it displays a list of the plug-ins available at that site. (If there is a problem, recheck the URL.) Select the items to install, in this case the PyDev for Eclipse plugin:
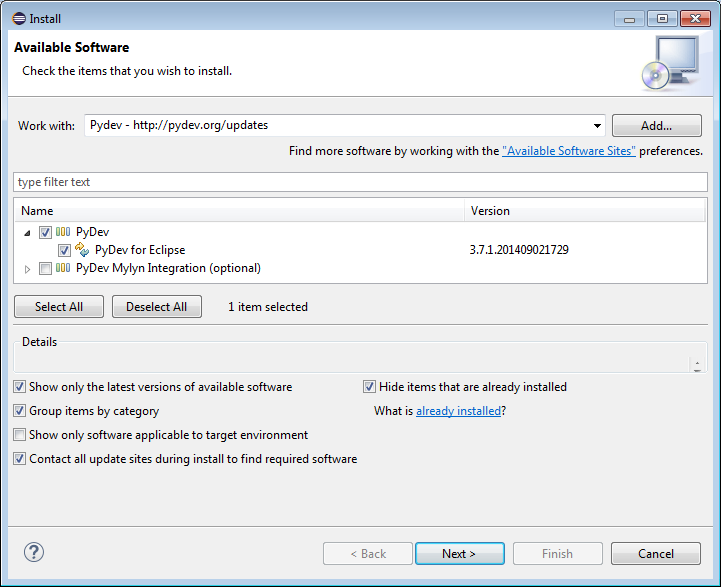
Press to complete the PyDev installation.
Eclipse allows you to review the plug-ins you wish to install and then may ask you to accept any applicable license agreements. Eclipse then installs the selected plug-ins. Restart Eclipse.
Step 5: Configure PyDev
PyDev must be configured in order to work properly with your Eclipse and Python set ups. From the Eclipse main menu:
In Windows: Choose Window / Preferences
On Macs: Choose Eclipse / Preferences
In Linux: Choose Window / Preferences
This brings up the Preferences dialog box. Choose PyDev / Interpreters / Python Interpreter (outlined in red):
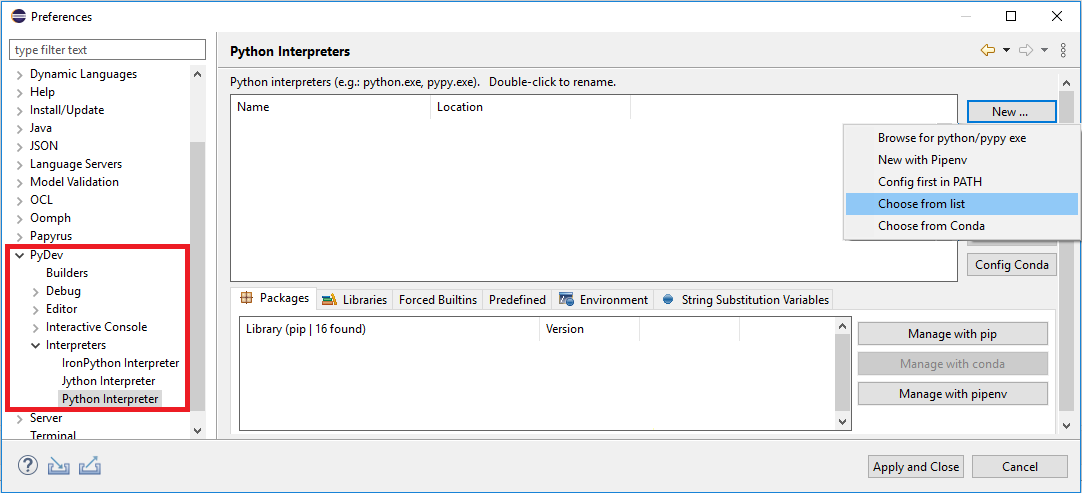
Press to generate a list of Python interpreters installed on your computer. (If you multiple Python interpreters installed on your computer, you may see other interpeters listed.):
Select the latest version of Python 3 installed on your computer, and press .
On Macs: Macs come with Python 2.7 pre-installed. Make sure that you select the Python 3 that you installed earlier in the Eclipse install process.
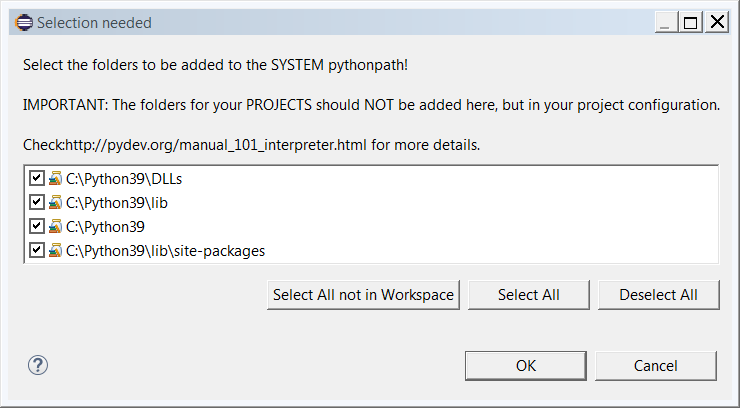
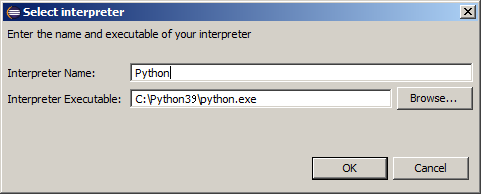
Note:
If does not give you a list of
Python interpreters, then you must configure PyDev by hand. In the Preferences
dialog above, press , and in the Select
interpreter dialog name the interpreter (ex: Python)
and browse to the location of your python.exe file and
select it. (The Python interpreter should be located wherever you
installed Python on your system.) The following is an example of what
the selected name and interpreter may look like:
Accept the default selections and press . The Preferences dialog box now shows the Python interpreter and libraries that you selected. Press to accept these values. Eclipse takes a moment to process these selections.
If asked to record preferences, turn off Recorder Enabled (as outlined in red):
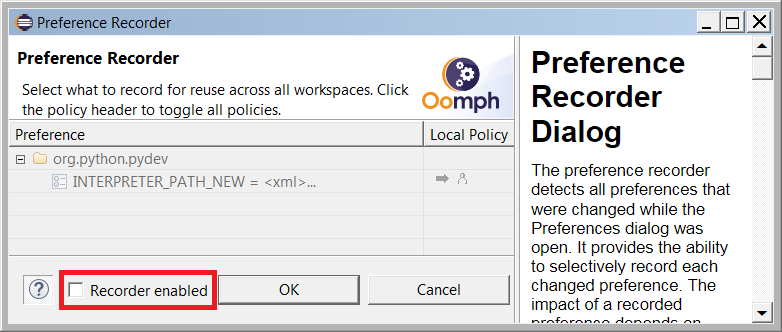
Press .
If asked to synchronize preferences to a remote server, select No:
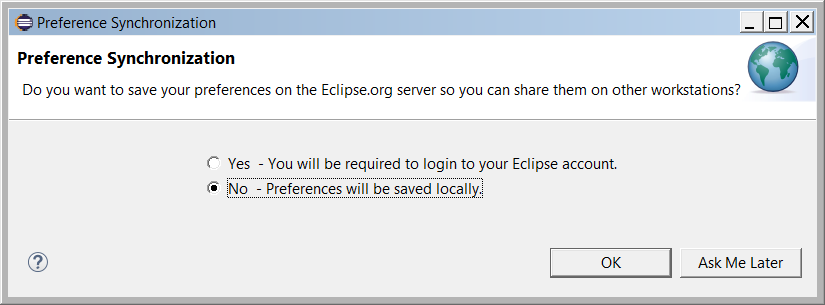
Press .
Step 6: Configure Eclipse
Eclipse must be configured to the CP104 coding standards.
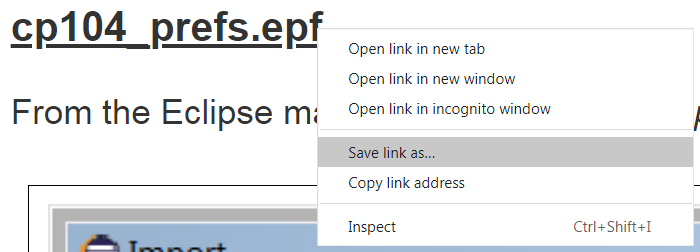
Right click on the following link to save this file to your Downloads folder:
cp104_prefs.epf
From the Eclipse main menu chose File / Import, and then select General / Preferences:
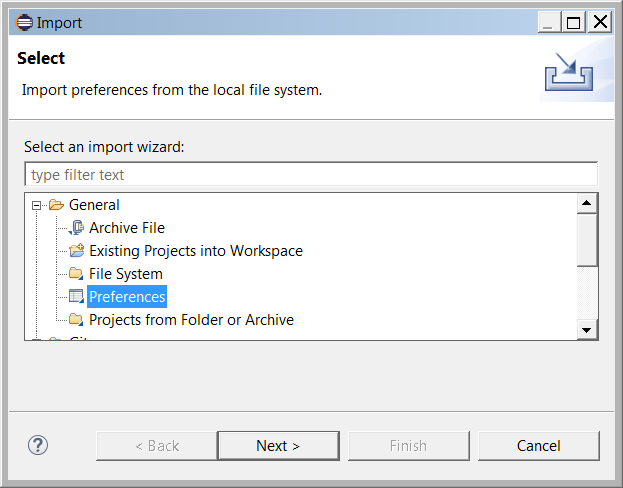
Press .
Select the cp104_prefs.epf you just downloaded:
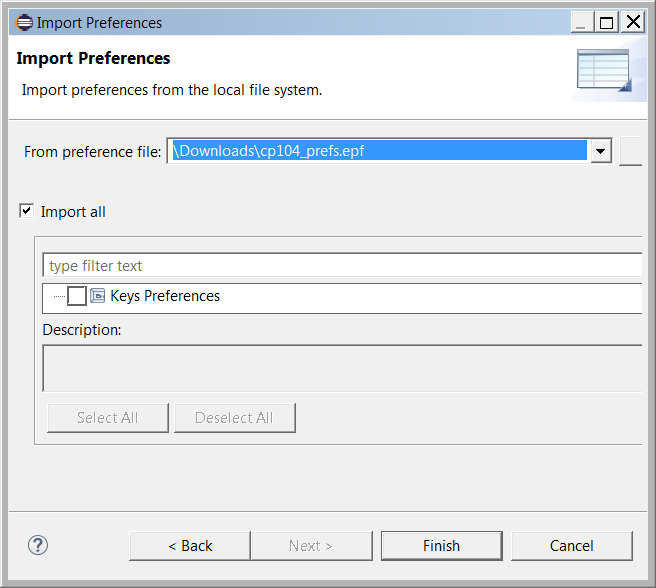
Press .
Eclipse asks you to restart:
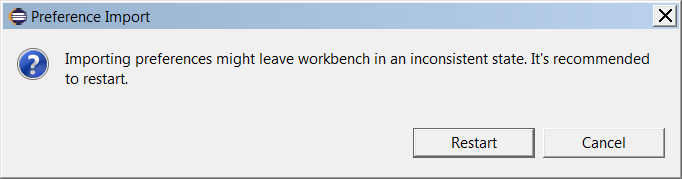
Press .
You are now ready to use Eclipse for CP104. Please read the Using Eclipse / PyDev tutorial in order to understand how to use Eclipse. CP104 Lab 1: Introduction walks you through the process of setting up and running Python programs in Eclipse.