The Custom UI Editor is an easier way to modify the underlying XML code that makes up the Ribbon in an Office 2007 and newer documents.
Download this basic stats tool as a starting file: basic_stats_tool.xlsm
Instructions
-
Save the spreadsheet file as a Macro Enabled Workbook (
.xlsm) file before you write more code. Name your spreadsheet with your network login followed by_l10.xlsm. For example, if your network login wasbarn4520, then your lab file should be namedbarn4520_l10.xlsm. Save often. -
Show the Developer Tab in Excel. In Excel 2010, click File / Options Customize Ribbon and check the option for Developer Tab.
-
Copy and paste this header into your code modules and fill it out:
Option Explicit

' ==== CP212 Windows Application Programming ===============+
' Name: Your Name
' Student ID:
' Date:
' Program title:
' Description:
'===========================================================+
-
When complete, raise your hand and show your task to the Lab Instructor or Marker to be marked. Your mark must be recorded before you leave the lab.
-
When finished upload your file to the Lab 10 Task Dropbox in MyLearingSpace. Saving the file to the Dropbox is simply a safety measure in the event there are problems with your grade later in the course.
-
Finding An Icon
- Download the Office 2007 Icons Gallery.
- Open the file and display the Developer tab to see the icon
gallery.
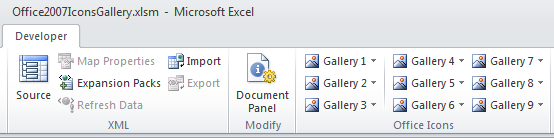
- Look for a suitable icon to display a form that calculates average, and take note of it. Clicking an icon displays the name and two views of the icon, large and small. Write it down if necessary and make sure to maintain proper capitalization as the names are case sensitive.
- Alternatively you can use a name such as HappyFace, or SmartArtAddBullet.
This is the name you place in the ribbon later.
To help choose icons (and the corresponding imageMSO value for the RibbonX code) use the Office 2007 Icon Gallery which is an Excel file that contains a custom tab displaying more than 3000 icons that can be used in your applications.
- Note: There is an Office 2010 Icon Gallery, but it is formatted into a custom Word Document and is less useful. There would be few icons that had changed that you probably wouldn't need anyway.
- Note: When viewed in Office 2013, the icon styling, if different, for the new version would apply.
-
Installing Custom UI Editor
- Download the Custom UI Editor and follow the installation instructions.
-
Creating a New Tab
- Open the Custom UI Editor. Place your mouse over the image below to see what each of the icons does.
- Click File / Open to select the
basic_stats_tool.xlsmfile you downloaded from the top of this lab. - Click Insert / Sample XML / Custom Tab.
- Change the label attributes to something more meaningful for the
tag label, the group label, and the button label. Change the
imageMsoattribute to the one that you choose from the the Office 2007 Icon Gallery. The place to make the changes are indicated below with yellow highlighting. The RibbonX code has been spread across different lines to make it more readable.
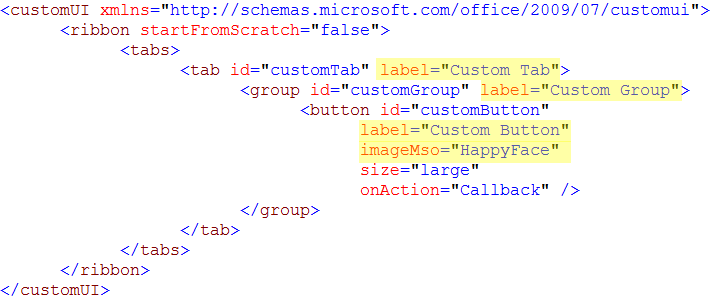
- Change the value of the
onActionattribute from Callback to the name of a subroutine that would be called when the button on the ribbon is clicked. Call it displayUserForm.- Also make sure you change the id of the button to btnDisplay or some other meaningful name.
- This would actually be the name of the subroutine you want called when you click that specific button.
- Click the Validate button (
 )to be sure that the XML code is
still well formed, and that there aren't any errors in it.
)to be sure that the XML code is
still well formed, and that there aren't any errors in it.
- Click the Generate Callbacks button (
 )
to generate the callback subroutine.
)
to generate the callback subroutine.
- Select the code that was generated in the callback window and copy it to the Windows clipboard. This code does not get added to your file automatically, you have to copy it from this window and paste it into a Module inside your Excel file.
- Click back on the file in the window to display the RibbonX code
again.
- Click File / Save.
- Click File / Close.
- Open the basic_stats_tool.xlsm file in Excel.
- Press Alt-F11 to go into the Code window.
- Double-click the module named
FormCodeand paste in the call back subroutine that you copied previously. - Add a line of code to this callback function that displays your
form, such as
frmAverage.Show. - Close the IDE, and click the new tab you created. Click the button and it should display Average tool form.
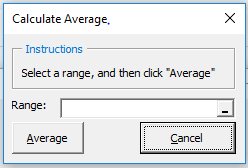
- The following userform should be appear:
- Select a range of cells, the average should appear as:
- You're done! Congratulations on creating a custom tab for your application!

Possible Problems
Cannot run the macro
On clicking the button you might receive an error message such as the one below:
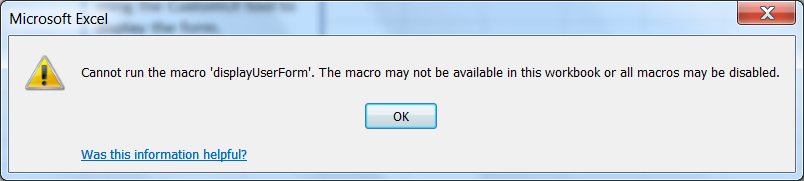
In this case, the name of the onAction value (in this case, displayUserForm)
doesn't match the name of the subroutine in the module. You can correct
this by changing the name of the subroutine in the VBE, or you can open
the Custom UI Editor again and fix the onAction value.
Wrong Arguments
You might also get this message, or it might appear after you fix the first problem:
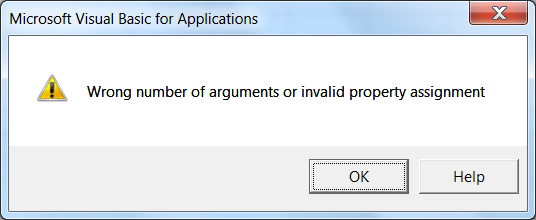
This problem indicates your subroutine isn't taking the correct number
of arguments. You need to have used the callback subroutine generated by
the CustomUI Editor. If you already have your own subroutines written,
you'll need to make sure the sub takes an IRibbonControl
object as an argument like this:
Sub displayUserForm(control As IRibbonControl)
    frmAverage.Show
End Sub
Now the subroutine executes by clicking the Ribbon button, but it can no longer be run from the worksheet in any way. It may look something like the image below.

Creating An Add-In
That completes the lab, but if you want to continue to the next step, you would convert your application into an add-in that can be deployed to multiple users and is always available, much like the Solver add-in.
Note