CP212 : Data Validation in Excel
Data Validation allows you to control the type of data that the user is allowed to enter into the spreadsheet. For example, you can specify that dates of a specific range or format are entered, or limit the data to specific formats that may be required for your application:
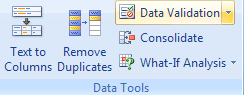
To start using Data Validation in Excel, select the cells which you want to control the input for and click Data -> Data Validation (from the Data Tools group):
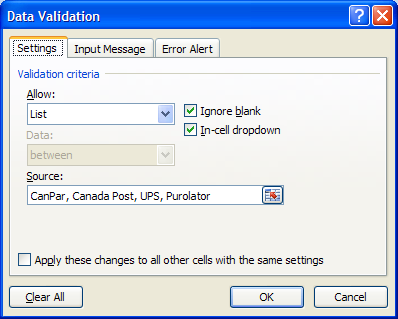
Then, the Data Validation dialog box appears:
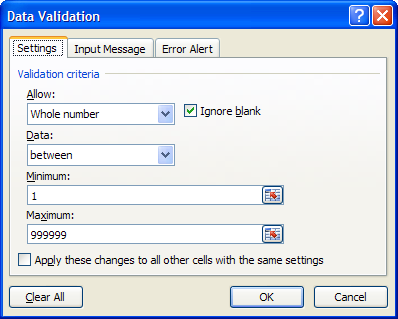
The Settings tab allows various Validation criteria to be entered, such as specific data types as well as data ranges. Next:
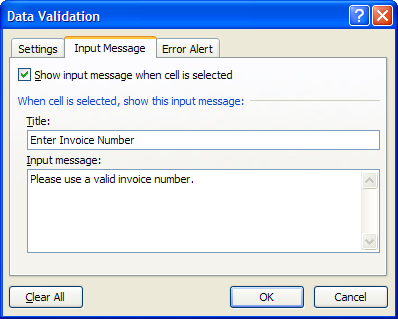
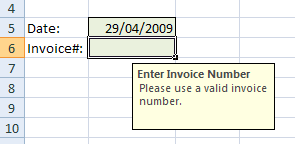
The Input Message tab allows you specify a message that helps the user enter values into your spreadsheet. Below is an example of what this message looks like when the user is entering data into the specified cell:
Setting Error Alerts
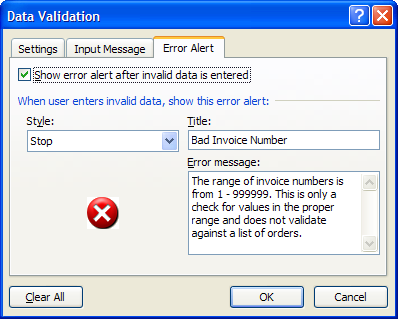
The Error Alert tab allows you to choose from 3 different types of alerts: Stop, Warning or Information. Each has a unique icon and a set of buttons with various choices that allows the user to change the values or continue on. The results of each of the buttons can be crucial to the flow of your program and can sometimes make the difference between a pleasant user experience, and a hair pulling one.
Each option has a specific default value. If the user presses the Enter key on the keyboard, the default button is activated.
Stop Errors
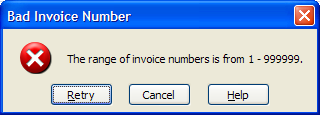
Using the Stop option gives the option for the Retry, Cancel and Help buttons.
- Retry: User is sent back to the current cell to change the value. The value is selected so the user doesn't have to delete anything, just enter a new value. Many users are not aware of this detail. This is the default.
- Cancel: The value is accepted into the cell, but the cell stays active instead of moving to the next field.
Warnings
This dialog is the error message that gets displayed when using the Warning setting in Data Validation:
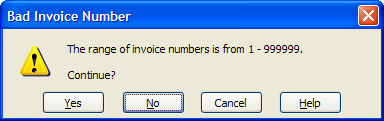
- Yes: The spreadsheet accepts the entered value and move the active cell to the next field.
- No: User is sent back to the current cell to change the value. This is the default.
- Cancel: The value is not accepted into the cell, but the cell stays active instead of moving to the next field. The previous cell value is restored.
Information messages
With Information dialogs, the user is given the OK, Cancel and Help buttons.
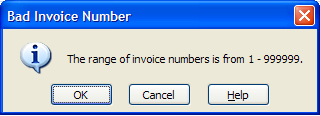
- OK: The spreadsheet accepts the entered value and move the active cell to the next field. This is the default.
- Cancel: The value is not accepted, and the previous cell value is restored. Cell stays active instead of moving to the next field.
(Also notice how wide the dialog box gets with long messages because the error text cannot be formatted with line breaks.)

Checking for Invalid Data
If a user consistently ignores errors and continues to enter data, you could have a spreadsheet with many invalid entries. The Data Validation tool offers an option called Circle Invalid Data.
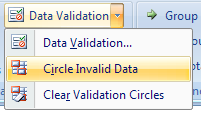
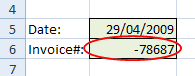
Turning this option on highlights all cells that contain invalid data by surrounding each invalid cell with a red circle.
Selecting Data from a List
The Data Validation option also allows you to select items from a list like this example:
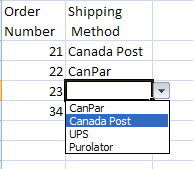
This can be created by editing a list by hand in the Settings tab of the Data Validation dialog box or the values can be from a list of cells from another worksheet or from another spreadsheet file:
Conclusion
This page has explained a very useful feature for creating Excel applications that few people know about. Remember to try and think of using the features of the application first before delving into VBA code. All of the above can be duplicated using VBA code but it would take a lot of work. This may be required when your users don't know enough about spreadsheets to work directly with editing the values in the cells.
You may want to control the entire data entry process by creating a custom form and
only giving the user access to that form. This is known as developing a dictator
application
. For more information on this, read Power Excel Development
[available to WLU students via Safari Online].