Overview
A DBMS is software that allows you to connect to and use a database. They generally provide a user-friendly front-end to simplify creating and querying tables. There are a number of free DBMS's available - we recommend the following:
- HeidiSQL
- MySQL Workbench
Click on the appropriate tab for more information on these DBMS's.
You are welcome to use any other DBMS you like. If you find a good, free one (Laurier likes free), please let us know. (Email David Brown at dbrown@wlu.ca with the details.)
HeidiSQL
HeidiSQL is a Windows-based DBMS that is installed in Laurier's public labs and virtual Windows system. HeidiSQL can be installed as a standard Windows program or used in portable mode from a USB stick or other device.
Starting HeidiSQL brings up the Session Manager. This window allows you to define a reusable database connection session. Press , give the session a name, and fill in the items in the Session tab. This sample window shows the data to provide to connect to a student database schema:
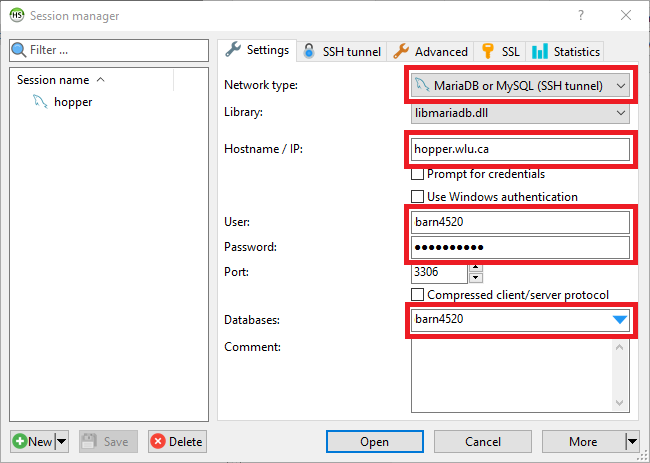
Your database settings are:
- Network Type:
MariaDB or MySQL (SSH tunnel) - Hostname/IP:
hopper.wlu.ca - User: your Laurier login (example here is
barn4520) - Password:
cp363_Pass(unless you've changed it) - Database: your Laurier login (example here is
barn4520)
Define the SSH Tunnel configuration:

SSH executable: points to a program on your PC that can create an SSH connection with an external server. We recommend installing the program plink, which is part of PuTTY: a free SSH (Secure SHell) client. (Since HeidiSQL is a Windows-only program, the lack of PuTTY on Macs is not relevant. Macs provide their own SSH software.)
Replace the sample login barn4520 and password with your
own Laurier login and Laurier password (not cp363_Pass).
Set Local port: to 3306.
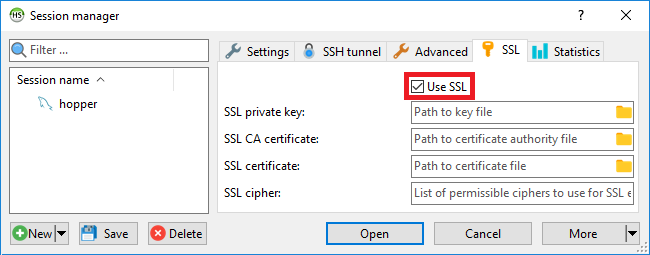
Use SSL: must be selected.
Press to name and save the
session (in this example named hopper), then press to connect to the database
server.
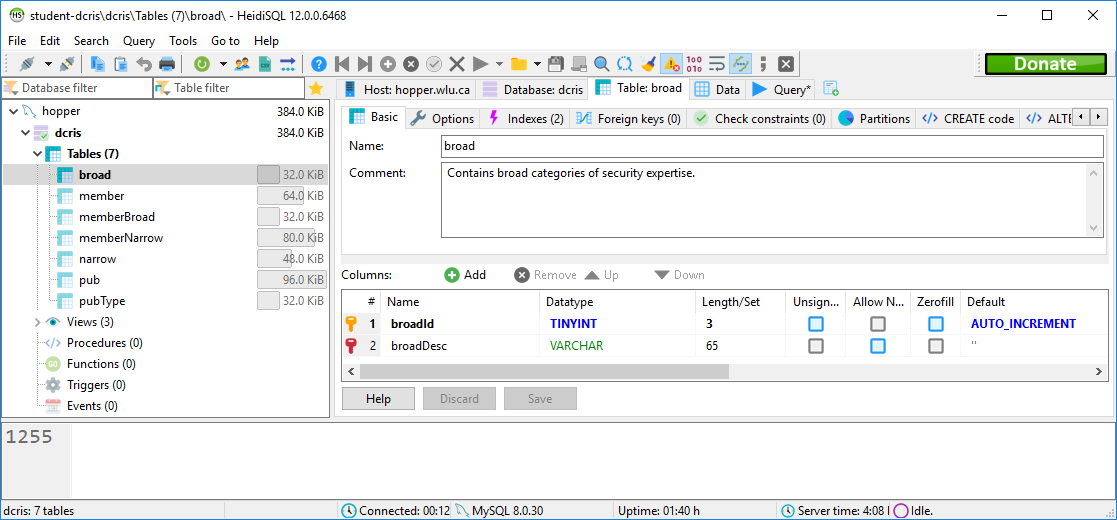
Once connected to a database, you may choose a database schema and open it up to examine its contents and structure. In the following example, the dcris database schema has been opened and we can look at its Tables, Views, Procedures, etc. Under Tables, the keyword table has been selected. Once a table has been selected, a series of tabs are displayed to the right of the database schema list. The three most important tabs are the Table tab:
the Data tab:
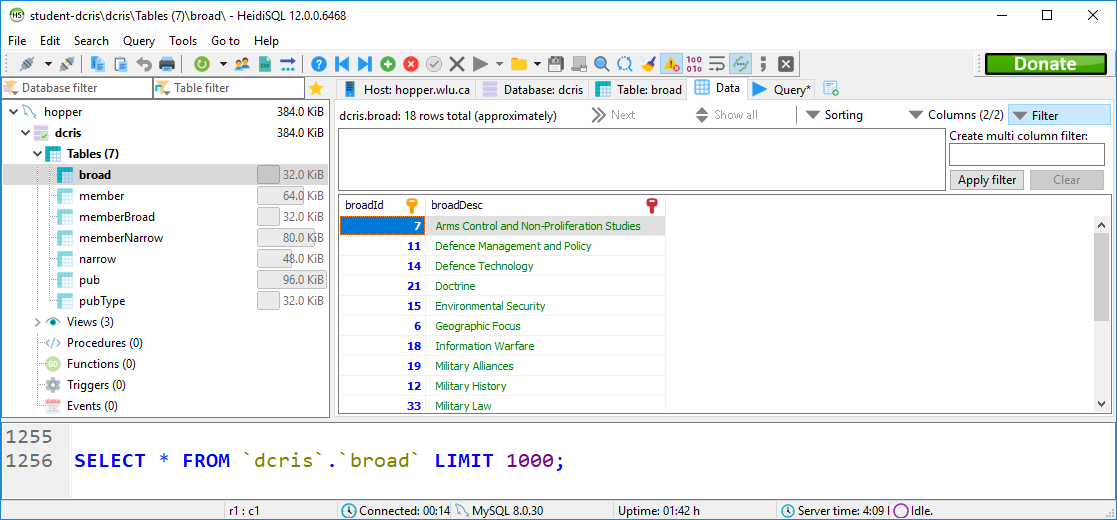
and the Query tab:
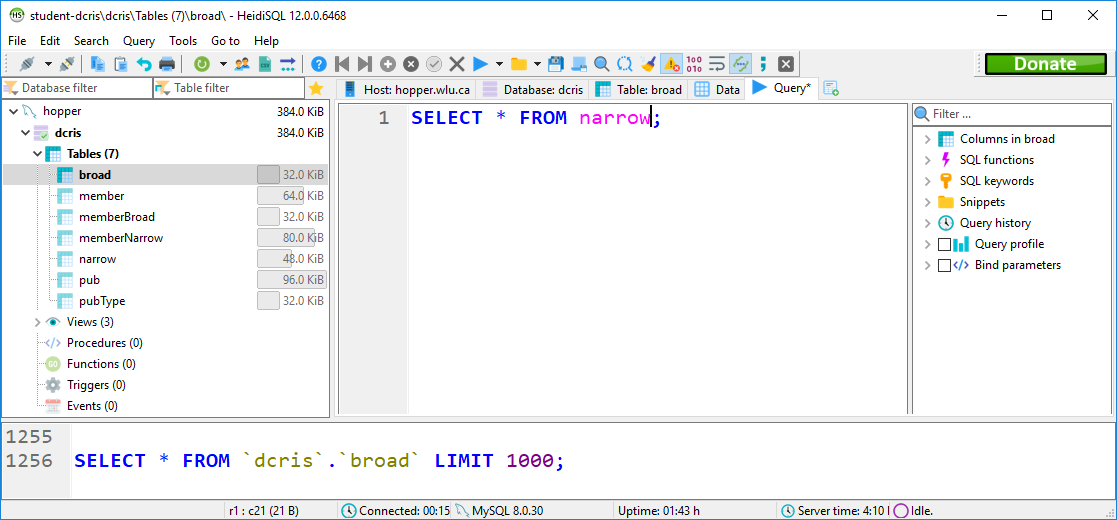
where you can enter your own SQL query statements and press the:
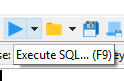
Execute SQL button to run your SQL query.
The purpose of this document is to get you started using HeidiSQL. Using HeidiSQL further is fairly straightforward. When in doubt, HeidiSQL provides a comprehensive help and tutorial document at Basic help on using HeidiSQL.
MySQL Workbench
MySQL Workbench is a DBMS that is available for Windows, Mac, and Linux. Note that you do not require an Oracle account to download this software - the download page has a No thanks, just start my download link you can use. Particularly on Windows, you may have to download a Visual C++ Redistributable Package to use Workbench. Finding and downloading the proper package is an exercise left to you.
Starting MySQL Workbench brings up the MySQL Workbench Welcome window. From the top menu, choose Database / Manage Connections. This brings up the Manage Server Connections dialog. This window allows you to define a reusable database connection session. Press , give the session a name, and fill in the appropriate items in the dialog. This sample window shows the data to provide to connect to a student database schema:
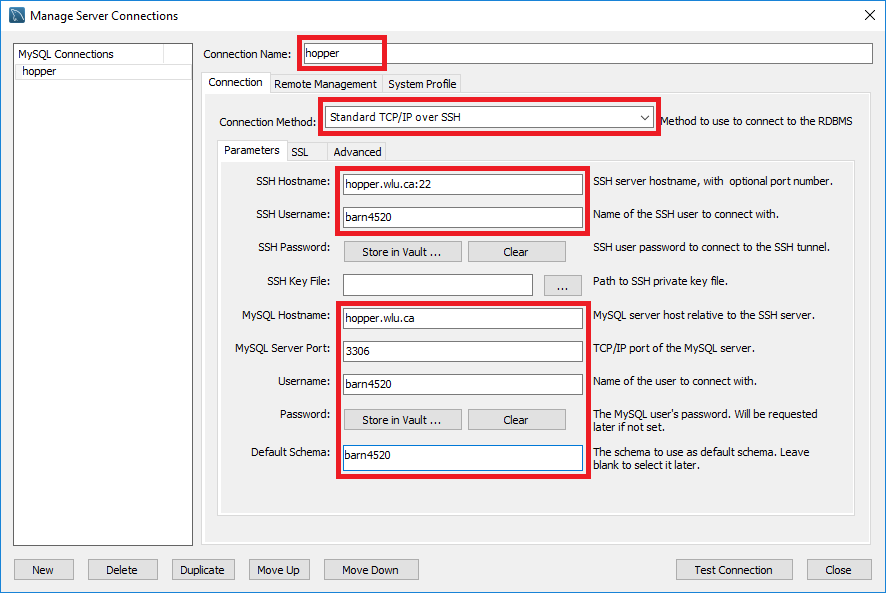
Your database settings are:
- Connection Method:
Standard TCP/IP over SSH - SSH Username: your Laurier login
- SSH Password: your Laurier password
- MySQL Hostname:
hopper.wlu.ca - MySQL Server Port:
3306 - Username: your Laurier login
- Password:
cp363_Pass(unless you've changed it) - Default Schema: your Laurier login
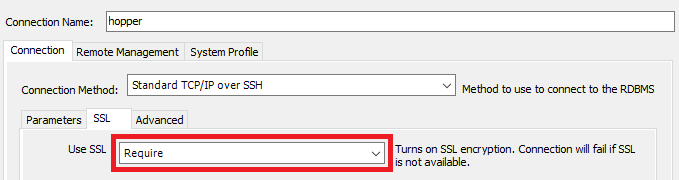
Click on the SSL tab and set Use SSL: to Require.
Press to save the session
(in this example named hopper. From the top menu,
choose Database / Connect to Database to use this stored
session information to connect to the database server.
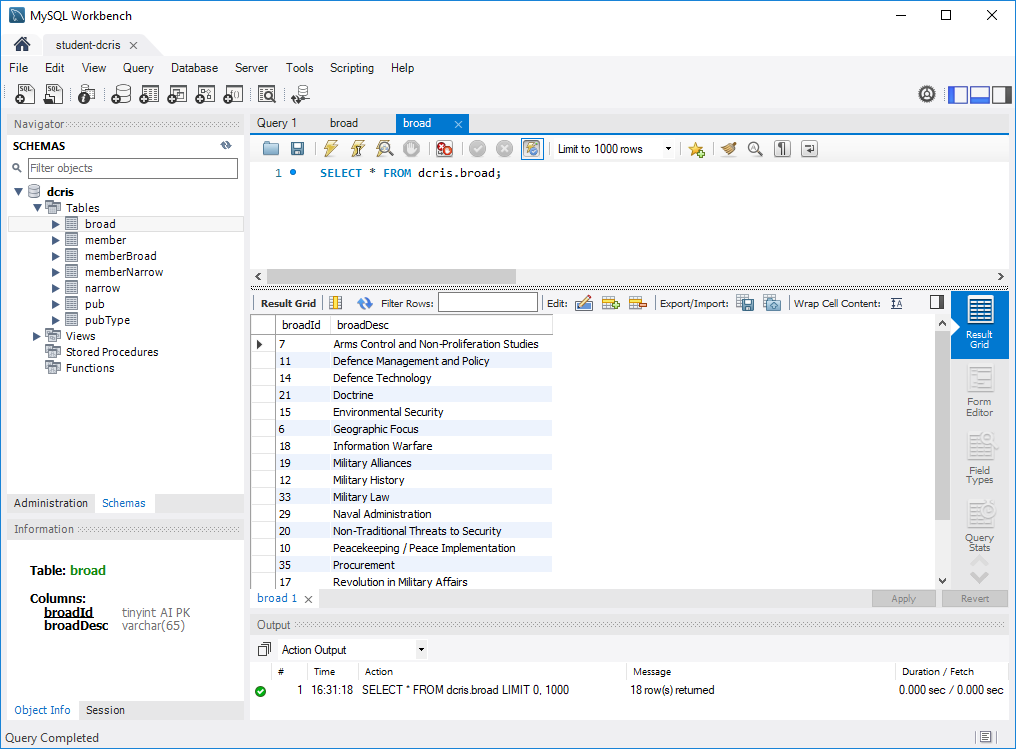
Once connected to a schema, you may use the Workbench to examine the contents and structure of the schema, by selecting the Schema tab in the Navigator dialog. The following shows an example of running a SELECT query against the keyword table:
The purpose of this document is to get you started using MySQL Workbench. Using MySQL Workbench further is fairly straightforward. When in doubt, MySQL Workbench provides a tutorial video at Video Tutorial: MySQL Workbench.