Objectives
- Examine spreadsheet applications that don't require VBA
- Develop a spreadsheet application without VBA
- Learn intermediate to advanced features of Excel: formatting styles, cell styles, data validation
Lab Lesson
Cell Styles
Cell Styles allow you to format cells in a specific way to act as a cue to the user as to how the cell should be used. On the Home tab, in the Styles group will find the Cell Styles tool and gallery.
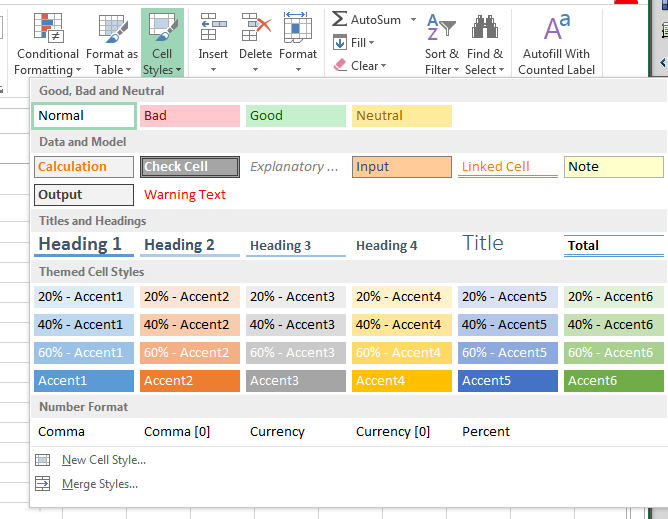
The Cell Styles in the Data and Model category are particularly useful when developing spreadsheet applications.
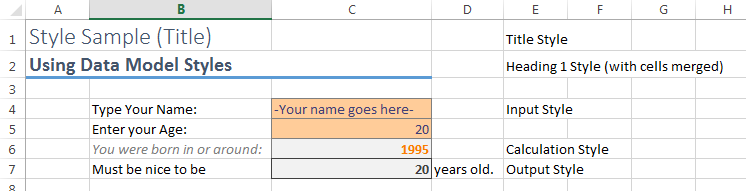
Below is a simple, contrived example of using some of the styles:
Activities
Sample Applications
Break Even Analysis - a basic spreadsheet, and also an improved version but without using VBA. This is what is meant by a basic Excel application, although it really is just a spreadsheet using some advanced features of Excel. Open this application and examine it.
Codeless Heart Rate - a simple application to calculate your training heart rate, but using good design techniques including the use of graphics, data validation and locked cells.
Worksheet Controls - a spreadsheet applications using controls that are placed on the worksheet but does not contain any VBA code. This example creates an amortization table for a large bank loan (mortgage).
Tasks
Instructions
-
Save the spreadsheet file with the extension(
.xlsx) since no VBA code is written in this lab. Name your spreadsheet with your network login followed by_l01.xlsx.For example, if your network login was
barn4520, then your lab file should be namedbarn4520_l01.xlsx. Save often. -
Lab tasks must be completed and submitted by the submission due.
-
Upload your completed task files to the Dropbox folder named Lab01 in MyLearningSpace for grading.
Develop a Codeless Excel Application
-
Create a blank worksheet
-
Save it as an Excel Workbook (.xlsx) file because it won't store any VBA code.
-
Format all of the cells in a useful area (about 30 rows by 8 columns) a neutral colour such as grey.
-
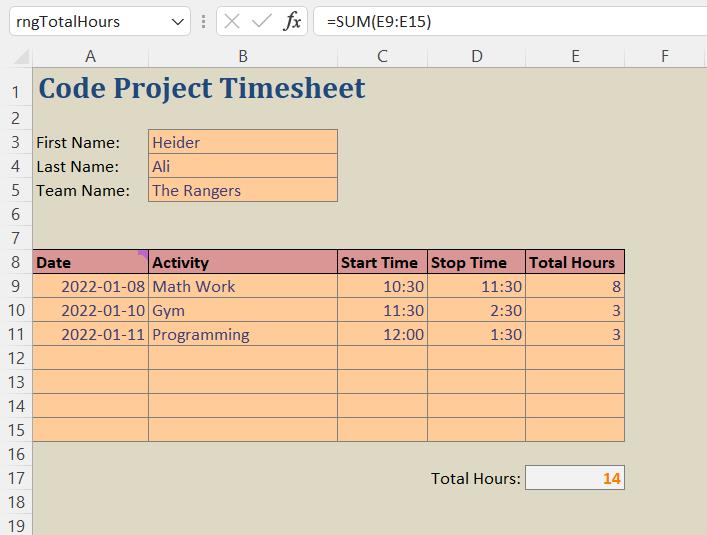
In cell A1 enter the title Code Project Timesheet and format as Title Style on the Home tab, in the Styles group.
-
Include fields for First Name, Last name and Team Names and include a label beside each cell. Format all three using the Input Style.
-
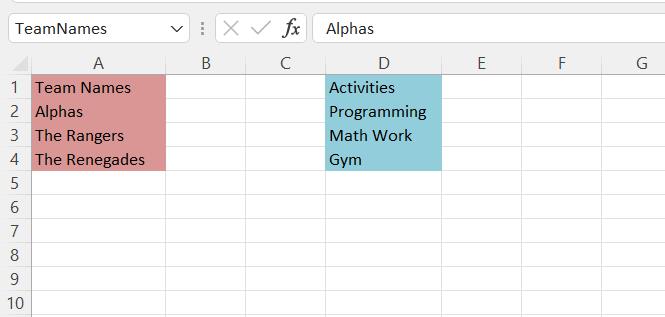
Create a new worksheet called wksData. In A1 write Team Name and beneath it enter a few team names. Select the range of team names and name it TeamNames.
-
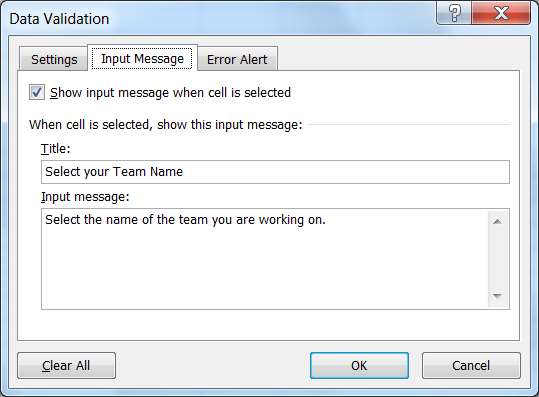
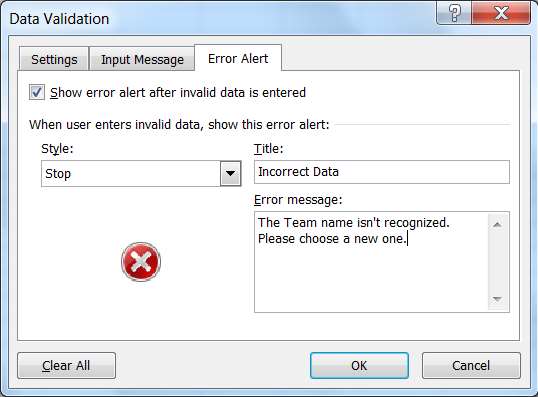
Use data validation ( Data > Data Validation ) in the cell for Team Name to only allow entries to be selected from the Team Name range:
- Select cell B5.
- Click the Data tab, and click Data Validation.
- Specify messages
for input ( Title: Select your Team Name, with appropriate input message) as well as Error Alert, and specify that the list of
team names must come from the rngTeamName range of cells.

-
-
-
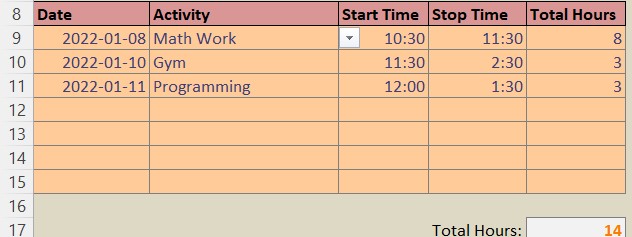
On the worksheet below the names, enter the columns headings for Date, Activity, Start Time, Stop Time and Total Hours.
-
Format that row with a cell background and bold the headings.
-
Format the next six rows using the Input style in the Styles group on the Home tab.
-
In the cell B9 use data validation ( Data > Data Validation ) in the cell for Activities in sheet wksData to only allow entries to be selected from the Activities range:.
-
We will have the user enter the total hours spent as well as the start and end time. There are more advanced techniques that can be used to calculate the time spent on each activity. See the sample timesheet2.xls on the lab web page for an example.
-
Below the entry form, place Total Hours: in one cell and beside it format the cell as Calculation style.
-
Enter a formula to calculate the SUM of all the total hours cells. It is shown in my cell E17 in the example shown above.
-
Name the cell (E17) rngTotalHours. This way a consolidation macro can look through multiple timesheet files and grab the total hours recorded there.
-
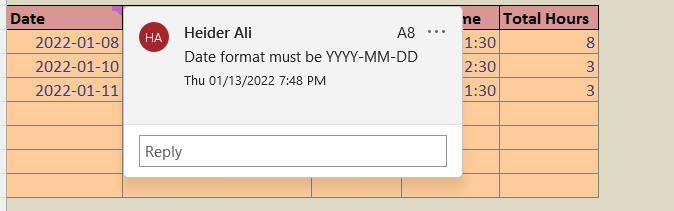
In the first Date entry cell, add a cell comment (click Review > New Comment) saying the date format should be in MM/DD/YYYY format. This is just simple way to try and get the users to enter valid dates. There is however a feature in Data Validation that allows only dates in a range to be entered. When you insert a comment, it will disappear when your mouse is moved away from the cell unless you specify to show comments. This option is on the Review tab.
-
For all the cells the user needs to enter data in, right-click, choose Format Cells and remove the Protection for the cell (clear the Locked option). The Total Hours cell should still be protected because the user should not type anything there.
-
Delete the worksheet with the name Sheet 3.
-
Protect the spreadsheet so no other changes can be made. It is possible to use a password but we don't need to do this here. Click Review > Protect Worksheet for both sheets. You can also try Protect Workbook. Verify that the cells are locked but the user can still enter data into the appropriate cells.
-
Click View and remove the Column headings and gridlines.
-
The completed worksheet should appear like this one:
Links
Timesheet Example - A spreadsheet where the users actions could be controlled by Excel to make it a basic "dictator" application. More samples in future labs. Currently there is no VBA in the example, just advanced Excel use.
Decision Support Example - a more complex problem involving production scheduling - completed using VBA. This uses the Solver add-in, so if you want to try it you have to turn on the Solver add-in first. It might help to display the Solver dialog once (it is on the Data tab) and restart Excel.
Funny Name Generator - like the
name suggests. This page demonstrates cute graphics, moving shapes and a
custom
UserForm.
Blackjack - a game written in Excel.