Visual Studio Code Installation
In your browser, navigate to Visual Studio Code download page. The web page displays logos for Windows, macOS, and Linux
Download the VSCode installer for Windows/Mac/Linux. Once it is downloaded, run the installer.
After accepting all the requests, press the finish button.
Open the VSCode to verify the installation.
Now, install the
Remote Development extensionpack. It will let us open any folder in a container, on a remote machine, or in the Windows Subsystem for Linux (WSL) and take advantage of VS Code’s full feature set.
To open a CP386 workspace in a Linux environment and using IDE, follow the steps:
Start VS Code, run the Dev Containers: Open Folder in Container… command from the Command Palette (F1) or quick actions Status bar item, and select the project folder you would like to set up the container for:
Now, pick a starting point for your dev container and follow the steps below:
Step 1:
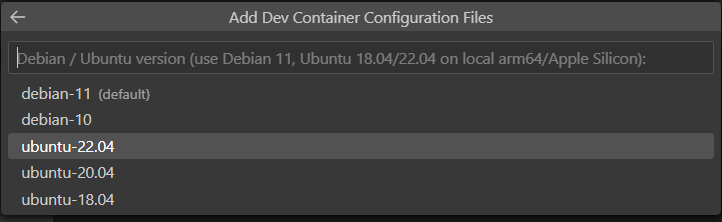
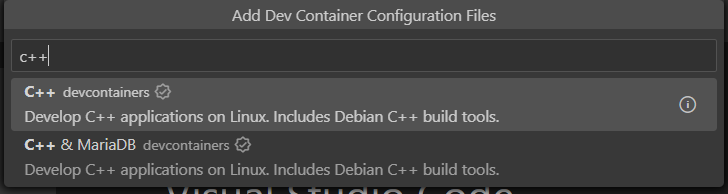 - Step 2:
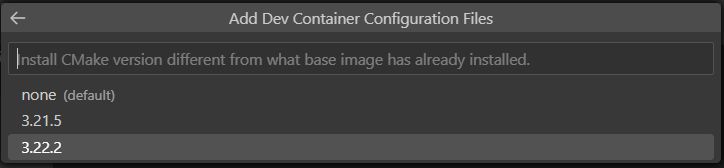
 - Step 3:
 - Step 4:

- The VS Code window will reload and start building the dev container. A progress notification provides status updates. Now, you can open Terminal and can run makefile. Enjoy your programming.
- If you chose to use WSL then you can connect VSCode to WSL2:
- Start VS Code.
- Press F1, select WSL: New WSL Window for the default distro or WSL: New WSL Window using Ubuntu for a specific version.
- Use the File menu to open your folder.
VSCode Extensions
autoDocstring Extension
Docstrings help understand code functionality and are essential for writing clean and well-documented programs. This extension will assist you in automatically creating default documentation whenever you create a new a Python function (Nils Werner (2023)).
The autoDocstring extension helps us quickly generate docstring for Python functions. By typing triple quotes ““” or ’’’ within the function, we can generate and modify docstring.
- In VSCode, select View -> Extensions or press Ctrl+Shift+X (Cmd+Shift+X on macOS) to open the Extensions view. It will display all the extensions available for VSCode.
- In the search bar at the top of the Extensions view, type “AutoDocString”.
- From the search results, locate the “AutoDocString” extension by Nils Werner and select “Install”.
- After installation, the button will change to “Reload” - click on it to reload Visual Studio Code and activate the extension.